How To Waterproof Bathroom
It goes without saying that waterproofing your bathroom is crucial. Not only will any faults in bathroom waterproofing likely lead to problems such as mould and damp, but they may even develop into structural issues, such as cracks and even subsidence.
With this in mind, it’s always worth making sure that your bathroom fittings are water tight. Waterproofing your bathroom is about much more than just choosing high-quality tiles and panels for your ceiling, walls and floor – you should also ensure that you are using the correct waterproof membranes, underlay and sealants. But, if you’re a DIY novice, you might be wondering how to waterproof bathroom properly.
Read on below for our guide on how to waterproof bathroom, from shower walls, to floors and fittings.
How to waterproof a bathroom floor
An insufficiently waterproofed floor could be disastrous in any home, as any leaks could lead to water dripping from the ceiling, creating damp and even far increasing the risk of a dangerous electrical fault.
If you’ve noticed water stains on the ceiling in the room below your bathroom or have spotted any cracks or gaps between grouting or panels on your bathroom floor, it may be a sign that your bathroom floor is not sufficiently sealed or waterproofed.
If you’re installing new flooring, lay the right foundations for waterproofing by following the steps below on how to waterproof a bathroom floor.
You will need:
- Dustpan and brush or vacuum cleaner
- Paint roller
- Waterproof primer
- Silicone sealant
- Masking tape
- Waterproof agent
- Waterproof membrane
- Clean the area. If your floor isn’t cleaned properly before you begin the waterproofing process, it may lead to problems further down the line. For best results, use a dustpan and brush to remove any dust, before using a vacuum cleaner to ensure a total clean.
- Apply your primer. A good waterproof primer will strengthen the adhesive bond between the sealant and the waterproof membrane, making this a very important step in the process. Use the paint roller to apply the primer for best results.
- Seal the gaps. Using silicone sealant to fill any gaps and small holes between the bathroom floor and the wall will increase the efficacy of your waterproofing. You should do this step 24 hours before the next step to allow the sealant to dry. For more information on this step, take a look at our dedicated guide on how to use silicone sealant.
- Apply masking tape. Apply masking tape around the wall to prevent getting the waterproof agent in spots where you don’t wish to apply it.
- Apply waterproof agent. Use a clean paint roller to apply the waterproofing agent, beginning at the back corner of the bathroom.
- Apply your waterproof membrane. Cut a length of waterproof membrane and lay it onto the floor, peeling the paper away from the adhesive side and smoothing any bumps.
- Last waterproofing coats. Apply two final coats of waterproofing agent on top of the waterproof membrane, allowing plenty of time to dry in between.
There you have it! Now you are ready to lay your new waterproof flooring.
How to waterproof shower walls
Waterproofing your walls is just as important as waterproofing your floor, with an improperly waterproofed wall leading to mould, damp and eventually increasing the risk of subsidence and structural damage.
It’s surprisingly easy for any damage between bathroom tiles to lead to these problems, so it’s important to check your bathroom tiling and to choose an appropriately waterproof wall covering to prevent these issues occurring.
Follow our guide on how to waterproof shower walls using DBS Bathrooms wall panels.
You will need:
- Damp cloth and hot, soapy water
- Grout
- Grout float or other grouting application tool
- Wall adhesive
- Your choice of DBS Bathrooms wall panels
- Clean the area. Use a damp cloth in hot soapy water to thoroughly clean your tiled wall.
- Inspect the grout. Inspect the grout between each and every tile on the wall – any cracks or gaps may indicate problems with your tiled wall’s waterproofing.
- Apply grout. Using a grouting tool, carefully apply grout to all of the gaps or cracks you have identified, smoothing these out to ensure a high-quality finish. Leave this to dry thoroughly.
- Install wall panels. Now you can install your new bathroom wall panels! For more information on how to do this, take a look at our dedicated guide to tongue and groove wall panel installation. Adding trims to your wall panels will help their waterproof properties, as well as providing a professional finish to your interior design project.
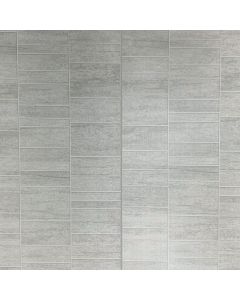
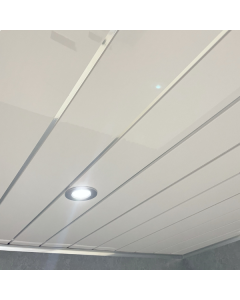
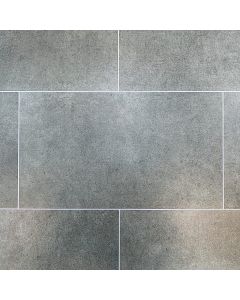
All the wall panels in the DBS Bathrooms range are 100% waterproof and can be easily installed right over your existing tile.
We offer a wide range of wall panels, with something to suit all tastes. Whether it’s our timeless White Marble 5mm Bathroom Wall Cladding, simple White Ash Gloss 5mm Wall Panels or our glamourous Grey Sparkle 5mm Bathroom Wall Panels, every product in the DBS Bathrooms range is easy to install with no need for professional decorators.
How to waterproof a shower and other fixtures
It goes without saying that each and every plumbing fixture in your bathroom must be properly waterproofed to avoid disastrous leaks and structural damage. It’s important to know how to waterproof a shower
Showers, toilets, basins – if any fitting within your bathroom isn’t properly sealed in place, the resulting leaks could be a real cause for concern. Signs to look out for include visible water leakage, a smell of damp or increasing water bills.
In order to ensure that you’re properly waterproofing your bathroom fixtures, follow the guide below.
You will need:
- Hot soapy water and damp cloth
- Silicone sealant
- Masking tape
- Stanley knife
- Protect the area. Ensure that you’ve protected the area surrounding whichever fitting you are sealing. This can be done using waterproof tape, masking tape and, if you’re working around a toilet or sink, old towels or bedsheets.
- Remove old sealant. Using the Stanley knife, carefully cut along the old sealant. If you do this neatly enough and the sealant is still intact, it may be as simple as then peeling the sealant away. However, if the sealant is very old, it may come away in much smaller pieces – persevere and make sure you remove all of this to ensure your new sealant is applied properly.
- Apply new sealant. Carefully apply new sealant, practicing your application on a piece of card first to ensure a neater finish. For more information, check out our dedicated guide to applying silicone sealant.
Ensure you leave your sealant to dry for at least 24 hours for the best results!
How to waterproof bathroom: top tips
- Adding an exhaust fan can also help to expel any moisture from the air in your bathroom.
- If you’re using paint anywhere, ensure it is waterproof and high gloss for maximum water repelling properties.
- Use bath mats.
- Use a tightly fitting shower curtain.
- Mop up any spilled water immediately.
Keep any cracks caulked.
How to waterproof bathroom with DBS Bathrooms
At DBS Bathrooms, we offer a range of products with high quality at the core of their design. Each and every bathroom wall panel in the DBS Bathrooms range is 100% waterproof, while our silicone sealant range is strong, easy to apply and will last for as long as you need!
For more information on the DBS Bathrooms range or to request free samples of any of our tongue-and-groove wall panels, get in touch with DBS Bathrooms today.


