

How To Apply Bathroom Sealant
One of the finishing touches for any bathroom, sealant can be tricky to apply if you don’t know what you’re doing.
The most common type of bathroom sealant is silicone, which is used to finish joints, keep out moisture and fill in any seams or other gaps. Silicone sealant is elastic and can allow for a certain amount of movement, and it comes in tubes and cartridges.
One singular cartridge is generally enough for a 5mm seam of around 12-13 metres long. We have composed this guide to help you do it yourself, and properly apply silicone sealant to your bathroom.
Tools for the job
You will need:
- Sealant gun
- Masking tape
- Triangular scraper
- Spray bottle
- Hobby knife
- Disposable rubber gloves
What type of sealant should you use?
The elasticity of the sealant determines how flexible it is, and how quickly it will harden. Universal sealant is the best choice for general use, but for the bathroom you should find a mould-resistant sealant. This will avoid blackening of the joint over time.
It’s also important to note that whilst some sealants can be painted over, others cannot. Most silicone sealants are available in white, grey, black, brown, or transparent, so you should choose a colour that best matches the underlying surface.
If you intend to paint over the sealant, remember that the paint itself is not elastic, so it may crack further down the line if there is any movement.
Beware of oxidation
If the sealant contains any acidic components, oxidation may take place on the underlying surface. This can happen on mirrors, stone and marble tiles, aluminium, and copper. To ensure that this does not happen, choose acid-free sealant.
How to apply silicone sealant
Step 1: Clean the surface
Put on some gloves and begin the sealing process. If you want to seal a surface or fill a crack in the corner of a wall, the first step will always be to clean the surface thoroughly. Our Sealux Cladseal kit includes surface cleaning tissues, which will help you in this process. Remove any loose material with your scraper or knife, then clean this out with a brush or vacuum. You should try to remove any glue, sealant or oil residues with spirit or degreaser.
Step 2: Lay down masking tape
As we’ve already mentioned, sealing a bathroom is one of the finishing touches, so there won’t be room to tidy this up later. If you’re confident in your work, you may not need this step, but we recommend it to ensure the cleanest possible result. This will complement the hard work you have invested into your bathroom, whether you have installed bathroom wall panels, completely remodelled, or are just freshening things up.
Apply masking tape so that it covers both sides of the line you want to create, then remove the tape before the sealant is dry.
Step 3: How to use the sealant gun
Use a hobby knife to cut off the seal of the cartridge. Then, cut a small part of the tip off the applicator nozzle to give you a narrow hole for the sealant to come through. If you need a bigger strip of sealant, then cut a bigger hole. Always make the line of sealant 1-2mm wider than the gap to be filled.
Then, load the cartridge into the sealant gun. When you pull on the handle, the applicator nozzle will fill with sealant.
Step 4: Make the seal
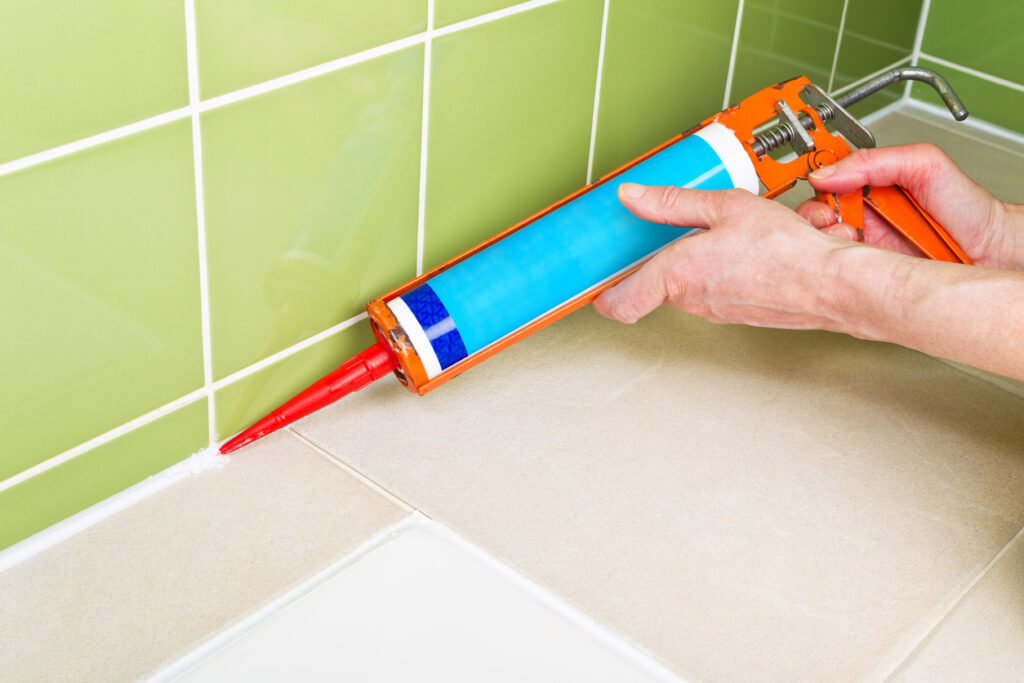
The best working position is to hold the sealant gun at an angle of 45º and pull the gun toward yourself. To apply the sealant neatly, you will need to find the right working speed for you; work too slowly and you’ll get a bumpy, irregular seal, but work too quickly and you won’t fill the gap properly.
When you get to the end of the seam release the handle and press the button or lever at the back of the sealant gun. This releases the pressure, so the flow of sealant stops immediately. If you fail to do this, the sealant will continue to pour from the nozzle.
Step 5: Finish the sealant line
Wet your finger with some soapy water, then smooth out the seam. The soap prevents the silicone sealant from sticking to your finger. You can also apply some soapy water with a spray bottle to remove any remaining traces of sealant without soaking the surface.
After the sealant has dried, you can remove the masking tape and scrape off the excess with a knife and a hard sponge. Special spatulas and cleaners are available to apply and remove the sealant, so if this is a big project you may want to consider purchasing these.
AS FEATURED IN


